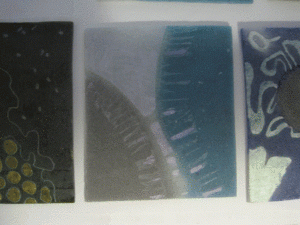
I did this project back in 2013, this is not a tutorial per se, but a walk through of a series of cast bottle glass frit panels that I made for an art show. It’s an interesting process, so I think you’ll enjoy seeing the steps.
I started by grinding gallons and gallons of bottle glass scrap separated out by color. This is my frit grinder, his name is Chewy:
Chewy is made with a galvanized garbage can with a garbage disposal set into the lid. The black nozzle that you see attaches to a shop vac with a HEPA filter to keep the dust contained. This contraption will make a variety of frit sizes all at the same time, which then have to be filtered with screens and sieves.
For my panels, I’m using the sizes shown here in blue. The right hand most sample is powder, and loses too much volume for this project. The next two sizes are similar to sugar and coarse salt. Once I filtered and washed all my frit, I built a grid in the kiln with fiber paper wrapped slices of kiln shelf. I can mix the frit because of the small particle size. This is a complicated topic, which I will explore more fully in a separate article.
The shelf side is going to be the face of my panels, so I built them in reverse, making sure the details that I wanted on the front of the panels were placed on the shelf first.
I filled each grid square to the top of the board and then pressed the frit down to compress it as much as possible. The grid is about 3/4″ deep. Then I fired the panels using a full fuse schedule that I modified by holding at the top temperature for nearly twice as long as a standard fuse.
You can see that the colors are much darker after firing, and the panels lost quite a bit of volume. The glass is now about 3/8″ thick. The two pieces on the far end both have large gaps where there wasn’t enough frit. These two panels were eventually sawn up into other smaller pieces.
Now comes the fun part. The panels were extensively coldworked (I don’t have photos of the process, just the stages). First, the edges were trimmed off on the tile saw to square up the panels and remove the sharp bits around the outside. Then, both the front and back were polished using a handheld polisher with diamond pads.
Finally, details were carved into the surface with a dremel tool and diamond bits. Once that was done, I painted the details with mica lusters.


 The panels were then fired again to a slump temperature (even though they are staying flat). The slump firing is hot enough to fire polish the ground surfaces of the panels, and hot enough to melt the mica lusters to the surface of the glass. Here is the green panel after firing, see how the surface is shiny and the carvings are also more difficult to see.
The next step is to add more metallic details after firing. These details are painted in using Rub’n’Buff, which is a compound of carnuba wax and metallic colorants. Because these are decorative panels and won’t be going through the dishwasher repeatedly, I feel confident that the colorant will be steadfast enough. (and, it is, 3 years later, it’s still very bright).

 The very last step in the process was adding hanging hardware and showing these beautiful things. I’m adding this photo of me in a suit because it only happens about once a decade!


