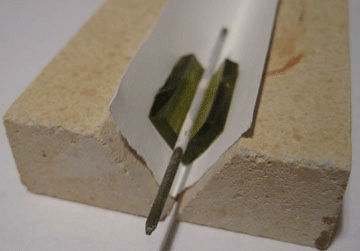
 In the last post we made a triangle bead mold for making fused glass beads. Today, we are going to walk through how to use the mold.
Step 1 – Line with Thin-Fire
 I cut my thin fire about 1/4″ (.6 cm) higher than the walls of my mold to compensate for shrinkage. You could also kiln wash the mold. The thin-fire is important because it will give your bead a nice clean edge on the bottom side.
Step 2: Cut your glass
 You can make your bead as long as you wish. Here, I have cut three pieces of bottle glass into 1″ (2.5 cm) long rectangles. Note that two of the pieces are 3/8″ (.76 cm) wide, and one is 1/4″ (.6 cm) wide. While the exactness of the measurements isn’t all that important, it is important to make one side slightly more narrow than the other two.
Step 3: Glass in the mold
 Start with one of the wider pieces of glass, making sure the mold is snugly together.
Step 4: Adding a mandrel
 Place the narrow piece of glass next, and add something to make a hole in the bead. I’ve used a short piece of stainless steel wire coated with kiln wash. I also used pieces of 1/8″ fiber paper cut into a thin strip in the same batch of beads. Both worked equally well.
Step 5: Adding the top glass
 Add the second wider piece of glass to the top. For practicality, it is easiest to build these beads directly on a shelf that will go into the kiln. If you are having trouble with them shifting as you move them into the kiln, a tiny bead of glue as you assemble would be helpful.
Step 6: Fuse!
I used a standard fusing schedule to make my beads. In fact, it’s nice to be able to just tuck these little molds in around the edges as you fuse other stuff.

