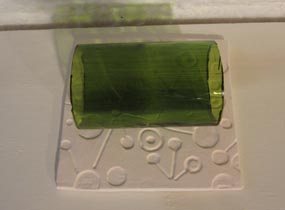
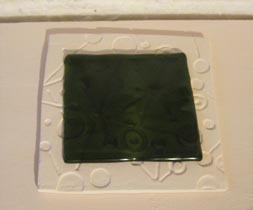
 Recently there was a question about how to flatten bottles enough to use in a kiln carving project. The short answer is: You don’t have too. The long answer is more easily explained with some photos and instructions. The cool thing is, this works for texture tiles too.
Bottles have a finite amount of glass in them, as we all know, somewhere around a pound in total. How do you translate that to a flat glass measurement? How do you use the small amount of glass that you have effectively?
Start with the body of the bottle, the neck and base cut off. You can use which ever kind of bottle cutter you prefer, I like to use a tile saw.
Measure the circumference of the bottle with a flexible tape. A sewing measuring tape works great.
 Here we have 9″. When a bottle slumps, it essentially folds in half, so half of 9″ is 4.5″ This is our estimated width of the flattened bottle.
Now, we cut the bottle body to be 4.5″ high as well,
 Now, if our calculations and cutting are correct, we should end up with a 4.5″ x 4.5″ square as the end result. Clean the bottle and put it on your texture tile (we’ll do kiln carving next).
 Okay, good, now fire as a full fuse and let’s see what we get.

 Excellent! Let’s see how our measurements worked out:


Pretty darn close. The side that measures 4.25″ is the circumference side, which is just slightly less wide than we estimated it would be. Taking that into consideration for future projects…let’s try again:
Here we are using a large Skyy vodka bottle to do a kiln carving. Start by measuring the circumference:
 So, circumference is about 13.25″. Half of that would be 6 5/8″. Taking into account our 1/4″ shrinkage from the previous trial, I am going to use 6.25″ as our estimated width of final project. This is an arbitrary number, I’ve estimated with the exact half and fell short, so this time I am estimating with less than half to see how close I end up. With me so far?
Now, cut the bottle cylinder to 6.25″ tall.
 And cutting a piece of fiber paper for kiln carving that will accommodate a 6.25″ square.
 So, clean the bottle and load them both into the kiln, making sure that you line up the center of the bottle cylinder with the center of the fiber paper. The center of the bottle cylinder is going to be the part touching the kiln shelf. If you’ve folded up your fiber paper prior to cutting it (like I did), this part is easy, the bottle goes on the fold.
 Let’s full fuse fire and see what we get:

 Excellent! How did our measurements turn out?

It looks like I ended up with a near perfect square, the take-away notes from these measurements are:
The squares typically end up a bit narrower than half of the circumference.
I would love for you to give this a try. My recommendation would be to do some fun experimental pieces before you go for broke on production work with this technique. And, as always, I would love to hear how it turns out for you, and photos make my day!
Related tutorials:
Jack O’lantern kiln carving tutorial
Reusing Kiln Carving Fiber Paper
Related Products:
BIG BOOK of Kiln Carving Patterns
- Pin Me!


